All about helmets!

Fitting a Helmet

A bike helmet that fits you properly will feel better — and do its job in case of a crash. But how do you select the right size bike helmet?

To find your bike helmet size, measure the circumference of your head using a cloth tape measure or a piece of string and a ruler. Be sure to measure horizontally across your brow and over your ears. Most helmets come with a size guide (or you can find one online), so make sure to measure your head before you go to save some time!

You also want to look for a helmet that matches your style of riding. Road bike helmets are designed to be lightweight, well ventilated and aerodynamic. Mountain bike helmets often offer extended rear head coverage to account for collisions with objects on off-road trails. If you’re an everyday commuter or recreational rider, look for helmets that are well-ventilated with an adjustable tightening wheel and visor to help shield some sun.

Get the right fit

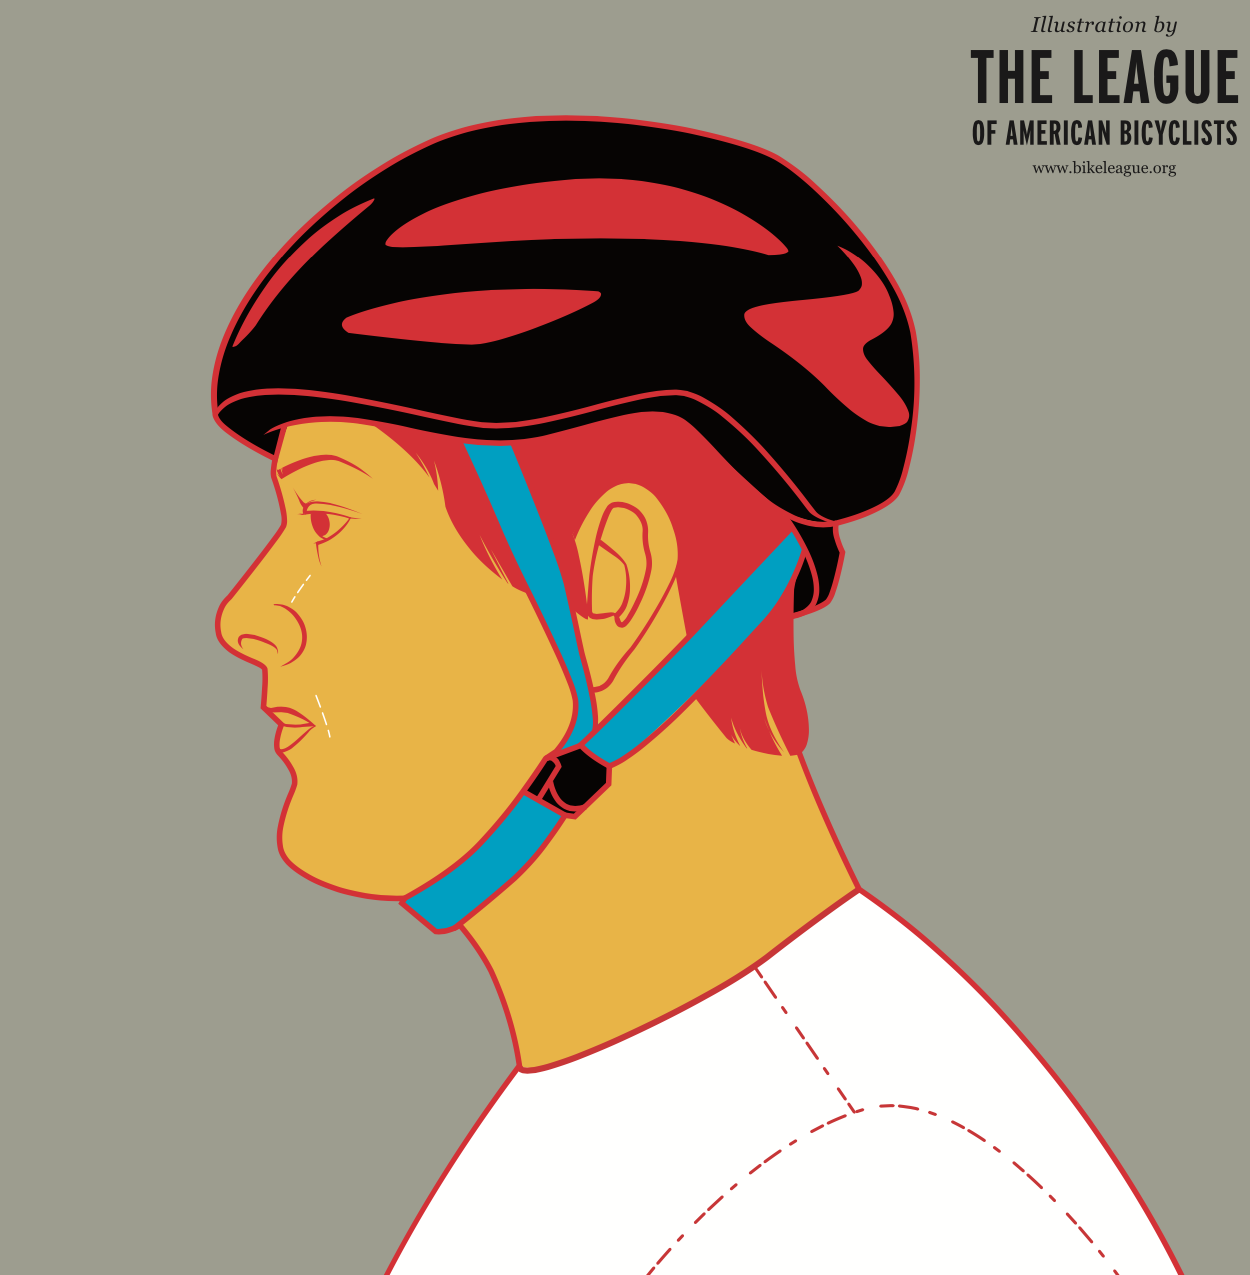
Put your helmet level on your head (not tilted back) with the front edge two fingers above your eyebrows. This helps protect your forehead.

If your helmet has one, tighten the rear adjustment dial until the helmet no longer wobbles or slips. It’s important to have your helmet properly positioned before tightening it.

Next buckle the chin strap. The straps should join right under your ear to form a “V”. Adjust the straps around both ears so they are not twisted and it’s comfortable. You can use your pointer and middle fingers to form a “V” around your ears to figure out the best position — snug but not too tight. Put those same two fingers together and put them between the strap and your chin. There should be enough room for two fingers. Any tighter and you may have trouble breathing, talking or drinking water while riding, any looser and your helmet can easily be knocked to the side.

A helmet that fits correctly should be comfortable and will not move forward (obscuring your vision) or backward (exposing your forehead.) A comfortable helmet is a helmet that you’ll actually wear!

Check out this video from our friends at Georgia Bikes.

Learn more tips on our Resources Page.

This blog post is produced thanks to support from the Governor’s Office of Highway Safety.
Walking Safely in Savannah

The greater downtown area is known for its walkability – but do you know the rules of the road?

Below are our tips for walking safely in Savannah, as well as applicable laws.

Safety Tips

  • Be predictable, and follow the rules of the road.
  • Walk on sidewalks when available and passable.
  • If there is no sidewalk, walk facing traffic and as far from traffic as possible.
  • Be alert! Never assume a driver sees you.
  • Whenever possible, cross streets at crosswalks or intersections. Look for cars in all directions.
  • If a crosswalk or intersection is not available, locate a well-lit area where you have the best view of traffic. Wait for a gap in traffic that allows enough time to cross safely; if you are crossing a multi-lane road, use extra caution when crossing each lane.
  • Watch for drivers entering or exiting driveways or backing up in parking lots.

The Laws

Pedestrians crossing at any point other than a marked crosswalk or an unmarked crosswalk at an intersection shall yield the right of way to all vehicles on the roadway.

When a pedestrian signal says WALK, you may proceed across the roadway. When it is flashing DON’T WALK, finish your crossing and do not start crossing if you have not entered the roadway. When it is steady DON’T WALK, do not start crossing.

“Crosswalk” means (A) That part of a roadway at an intersection included within the connections of the lateral lines of the sidewalks on opposite sides of the highway measured from the curbs or in the absence of curbs, from the edges of the traversable roadway; or (B) Any portion of a roadway at an intersection or elsewhere distinctly indicated for pedestrian crossing by lines or other markings on the surface.

Crosswalks exists at most intersections whether or not they are marked by painted lines.

“Jaywalking” is not a legal term and does not appear in the Georgia Code. Even so, people often use “jaywalking” to describe a pedestrian crossing outside of a crosswalk. In fact, crossing the street outside of a crosswalk is perfectly LEGAL in most places, as long as the pedestrians yield to traffic.

Do not suddenly leave a curb or sidewalk and walk or run into the path of a vehicle which is so close it is impractical for the driver to yield.

Learn more tips on our Resources Page.


This blog post is produced thanks to support from the Governor’s Office of Highway Safety.
S.I.C.K. Tips: How to Fix a Flat Tire on a Bicycle

Our Society of Important Cycling Knowledge (S.I.C.K.) is back with a quick tip on how to fix your flat tire!

Knowing how to change a flat tire is a useful skill, especially if you’re going on longer rides or don’t have a local bike shop nearby. It can be daunting at first, but it’s easier than you think! All it takes is some practice.

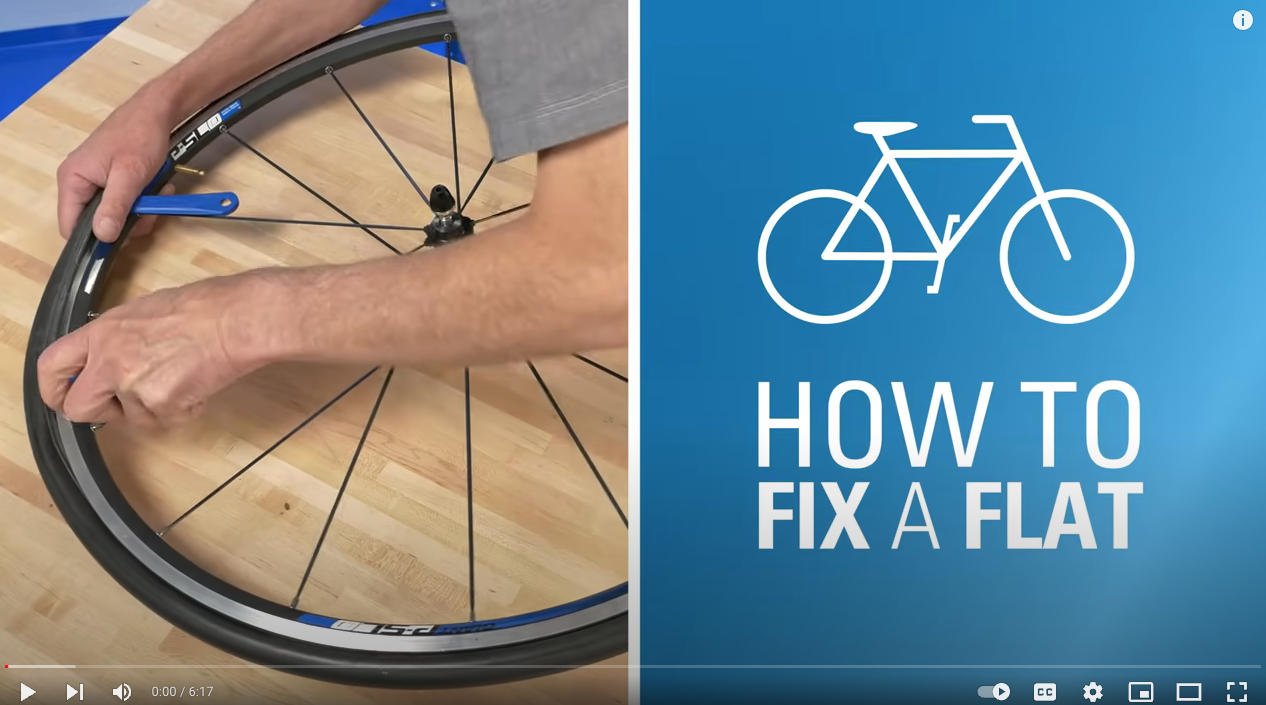
Our friends at Park Tools have a great basic overview of how to repair a flat tire on a bike. Read on for step by step instructions!

What you need:

  • Tire levers
  • Air pump
  • Wrench (for non-quick-release type wheels)
  • Replacement tube and/or tire
  • A repair stand can be helpful, but not necessary

How to:

  1. Remove your wheel
    1. Rear Wheel: Shift derailleur to the outermost gear and innermost front chain ring to give you chain slack.
    2. Disengage any rim brakes.
    3. Disengage the wheel from your frame.
      1. Quick Release: pull outward on end of quick-release skewer lever. If necessary, loosen quick-release adjusting nut to clear any tabs at end of fork.
      2. Thru Axle: some function similarly to quick-release axle – pull lever outward to disengage and turn to loosen. Some thru axles are equipped with a special fitting that must be engaged to loosen the axle. Still others are simple levers that turn to loosen or tighten – no engagement or disengagement is necessary.
      3. Solid Axle: For wheels with axle nuts, loosen both nuts outside of dropouts.
    4. On a front wheel, guide the wheel down and out of the fork. For rear wheels, pull back on the rear derailleur to allow the cogs to clear the chain and lower the wheel.
  2. Deflate your tube completely
  3. Remove your tire
    1. Push one side of the tire inwards, close to the rim of your wheel, to help loosen the tire bead from the rim. Do this around the entire wheel.
    2. Push one tire lever under the bead of the tire, between the tire and the rim of the wheel. It can be helpful to do this near the valve stem.
    3. Insert the second tire lever under the bead of the tire a few inches away from the first one, between the tire and rim of the wheel.
    4. Pull both levers toward spokes to lift the bead off the rim. Move one lever a few inches along the rim and lift the next section, proceeding around the wheel.
    5. Starting opposite the valve, pull the tube from the tire. Lift the valve from the valve hole to full remove the tube.
    6. Remove the tire completely to fully inspect the tire for any cuts or holes.
      1. You may be able to use a tube or tire patch kit to fix any small holes or cuts, but replacing the tube is always the safest and most reliable option.
  4. Inspect the wheel rim for any sharp edges or protruding spokes. No point in replacing a tube if your wheel rim is damaged!
  5. Install your tube
    1. Inflate tube enough to hold its shape
    2. Install tube inside tire, with valve adjacent to air pressure recommendations written on the sidewall of the tire.
  6. Lower tire and valve into rim valve hole. Note any directional arrows on your tire and orient the tire appropriately.
    1. Make sure to keep your valve pointing straight towards the hub of your wheel!
  7. Install one side of the tire bead at a time. You can use your tire lever carefully and strategically to help work the tire in, but be careful and avoid pinching your tube.
  8. Once both sides of your tire are installed properly, inflate the tube to low pressure and inspect each side for any bulging, inner tube sticking out, or inconsistencies. You may need to deflate the tube and reinstall the tube and tire.
  9. Once everything looks ok, inflate your tube to full pressure.
  10. Reinstall your wheel
    1. Work backwards from how you removed your wheel!
    2. Make sure any quick-release levers are tightened and your wheel is secure.
    3. Re-engage brakes.
    4. Make sure your wheel is centered in the frame or fork.

And now you’ve changed your tube and tire!

Want some practice? Volunteer with our New Standard Cycles Crew on Thursdays from 6:30-8:30 p.m. and Sundays from 2-4 p.m. and help fix up bikes while learning some new skills.

Learn more tips on our Resources Page.

Interested in putting your skills to the test? Stop by our New Standard Cycles volunteer sessions on Thursdays from 6-8 p.m. and Sundays from 2-4 p.m., and fix up bikes for people in need!


This blog post is produced thanks to support from the Governor’s Office of Highway Safety.

Pick Your Parking

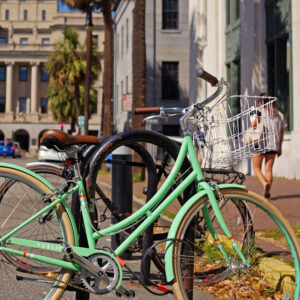
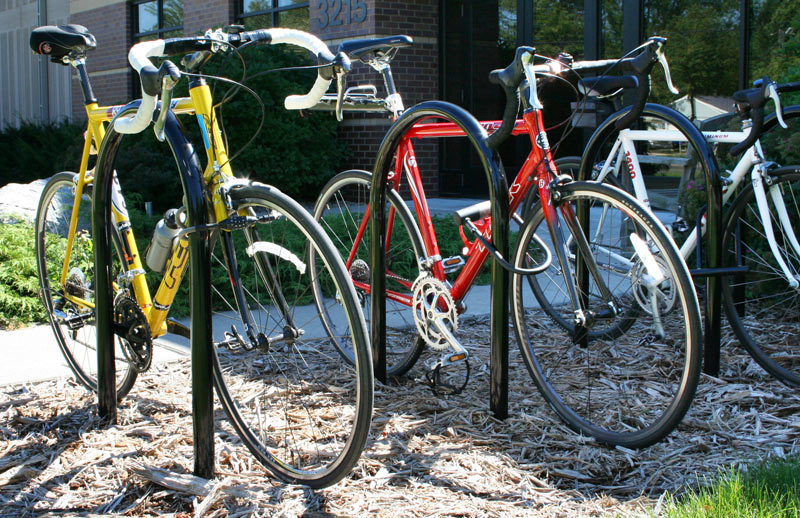
Nothing ruins your ride faster than having your bike stolen! Here are some steps you can take to seriously reduce the likelihood of that happening.

  • Use a U-lockCable locks can be cut more easily than you might think. Cheaper and older U-locks can often be broken without any tools. Sourcing your U-lock from a local bike shop is a good way to make sure you’re buying a quality product.
  • Don’t make it easy to steal! Bike thieves love low hanging fruit, and nothing deters them like the presence of a quality lock. Many thefts are crimes of opportunity, so make your bike the hardest one on the rack to steal.
  • Lock the frame first. Try to secure the wheels and seat, too. Your bike frame happens to be the most expensive part; make sure you lock it to something secure. Use a secondary cable to lock the wheels and seat. In many cases a U-lock can be used to lock both the frame and rear wheel. Accessories (lights, pumps, etc) are commonly stolen items. Take them with you.
  • Your lock is only as good as what it is locked to. Make sure whatever you locked up to isn’t going anywhere. Be mindful that trees and wood can be cut or kicked through.
  • Your garage, shed, or storage room isn’t as safe as you think. Even if you have parked your bike in a “secure location” be sure to lock it to something. Bikes are commonly stolen from garages or shared basements.
  • Document it! Take pictures of your bike, record the serial number, and where possible list your bike on your insurance.
  • After you’ve done that, make sure to register your bike with Savannah Police Department and Bike Index. The Bike Index makes stolen bikes harder to sell and easier to recover by making sure important information about your bike is there when you need it the most. The process is simple, secure, and free.

Need to find available bike parking in Savannah? Check out our map below. If you find a rack that isn’t on our map, please submit it to info@bikewalksavannah.org.

Learn more tips on our Resources Page.


This blog post is produced thanks to support from the Governor’s Office of Highway Safety.
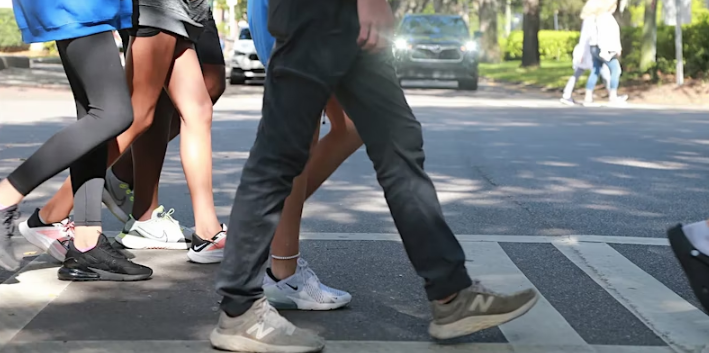
Get ready for your ride with the ABC Quick Check!

We’ve all had this happen — you get dressed, you put your helmet on, make sure your lights are charged, and as soon as you roll your bike out the door you notice the tires are flat. Or even worse, you get halfway to your destination and notice that you’re losing air — or your brakes are squeaking.

Familiarizing yourself with basic bike maintenance will help you whether you’re commuting to work every day or riding recreationally, and will help keep you safe. And the first part is as simple as knowing your ABCs! Performing the ABC Quick Check before heading out on your ride ensures your bike is safe to ride, and helps you notice when anything might go wrong.

A is for Air

Make sure your tires are inflated to the pressure listed on the side of the tire

When your tires are correctly inflated, use your thumb to gently push on the outside edge and feel the pressure. This will help you quickly gauge if you need air in the future!

Check for damage on your tire and replace if it is too worn

B is for Brakes

Inspect your brake pads for wear, replace if there is less than 1/4″ of pad left

Check pad adjustment and make sure they don’t rub the tire

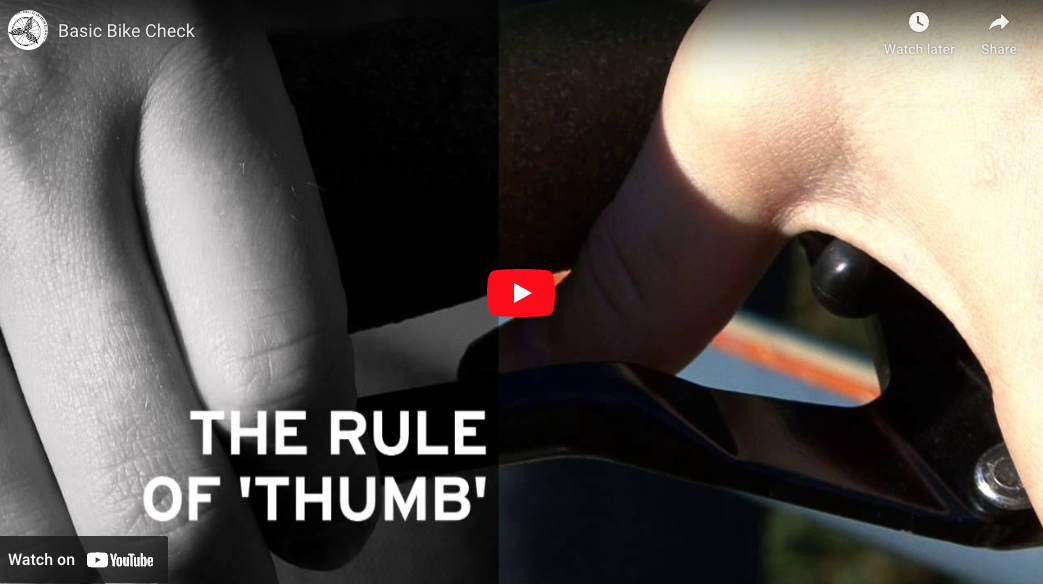
Look to see that you can fit your thumb between the brake lever and handlebar when the brakes are squeezed all the way — this means they’re properly adjusted

C is for Cranks and Chain

Pull on your cranks/pedals away from the bike — if they are loose, tighten the bolt.

Check that your chain is free of rust, gunk and any debris

Quick is for Quick Releases

Make sure all your quick release levers are closed (check your wheels and seat!)

They should all be pointing down and towards the back of your bike, so they don’t get caught on anything.

And then CHECK it all over!

Take a quick roll around to make sure everything is working properly, and if you’re carrying any cargo that you’re well balanced.


More of a visual learner? Check out this video from our friends at the League of American Bicyclists:

Learn more tips on our Resources Page.


This blog post is produced thanks to support from the Governor’s Office of Highway Safety.

How to Lock Your Bike

Nothing ruins your ride faster than having your bike stolen! Here are some steps you can take to seriously reduce the likelihood of that happening.

  • Use a U-lockCable locks can be cut more easily than you might think. Cheaper and older U-locks can often be broken without any tools. Sourcing your U-lock from a local bike shop is a good way to make sure you’re buying a quality product.
  • Don’t make it easy to steal! Bike thieves love low hanging fruit, and nothing deters them like the presence of a quality lock. Many thefts are crimes of opportunity, so make your bike the hardest one on the rack to steal.
  • Lock the frame first. Try to secure the wheels and seat, too. Your bike frame happens to be the most expensive part; make sure you lock it to something secure. Use a secondary cable to lock the wheels and seat. In many cases a U-lock can be used to lock both the frame and rear wheel. Accessories (lights, pumps, etc) are commonly stolen items. Take them with you.
  • Your lock is only as good as what it is locked to. Make sure whatever you locked up to isn’t going anywhere. Be mindful that trees and wood can be cut or kicked through.
  • Your garage, shed, or storage room isn’t as safe as you think. Even if you have parked your bike in a “secure location” be sure to lock it to something. Bikes are commonly stolen from garages or shared basements.
  • Document it! Take pictures of your bike, record the serial number, and where possible list your bike on your insurance.
  • After you’ve done that, make sure to register your bike with Savannah Police Department and Bike Index. The Bike Index makes stolen bikes harder to sell and easier to recover by making sure important information about your bike is there when you need it the most. The process is simple, secure, and free.

View our map of bike racks in Savannah here:


This blog post is produced thanks to support from the Governor’s Office of Highway Safety.
Signaling & Scanning

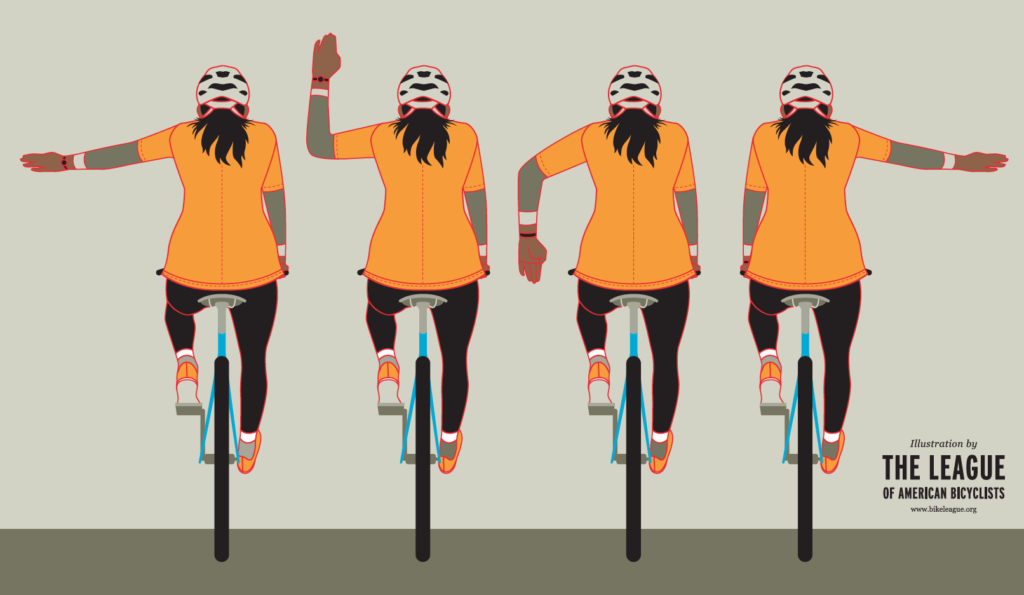
You should always let others know when you are turning, changing lanes or stopping — both for safety reasons, and because it’s the law.

While cars and motorcycles have devices built in, like turn signals and brake lights, we have to rely on our arms to signal our intent on a bike.

Signaling

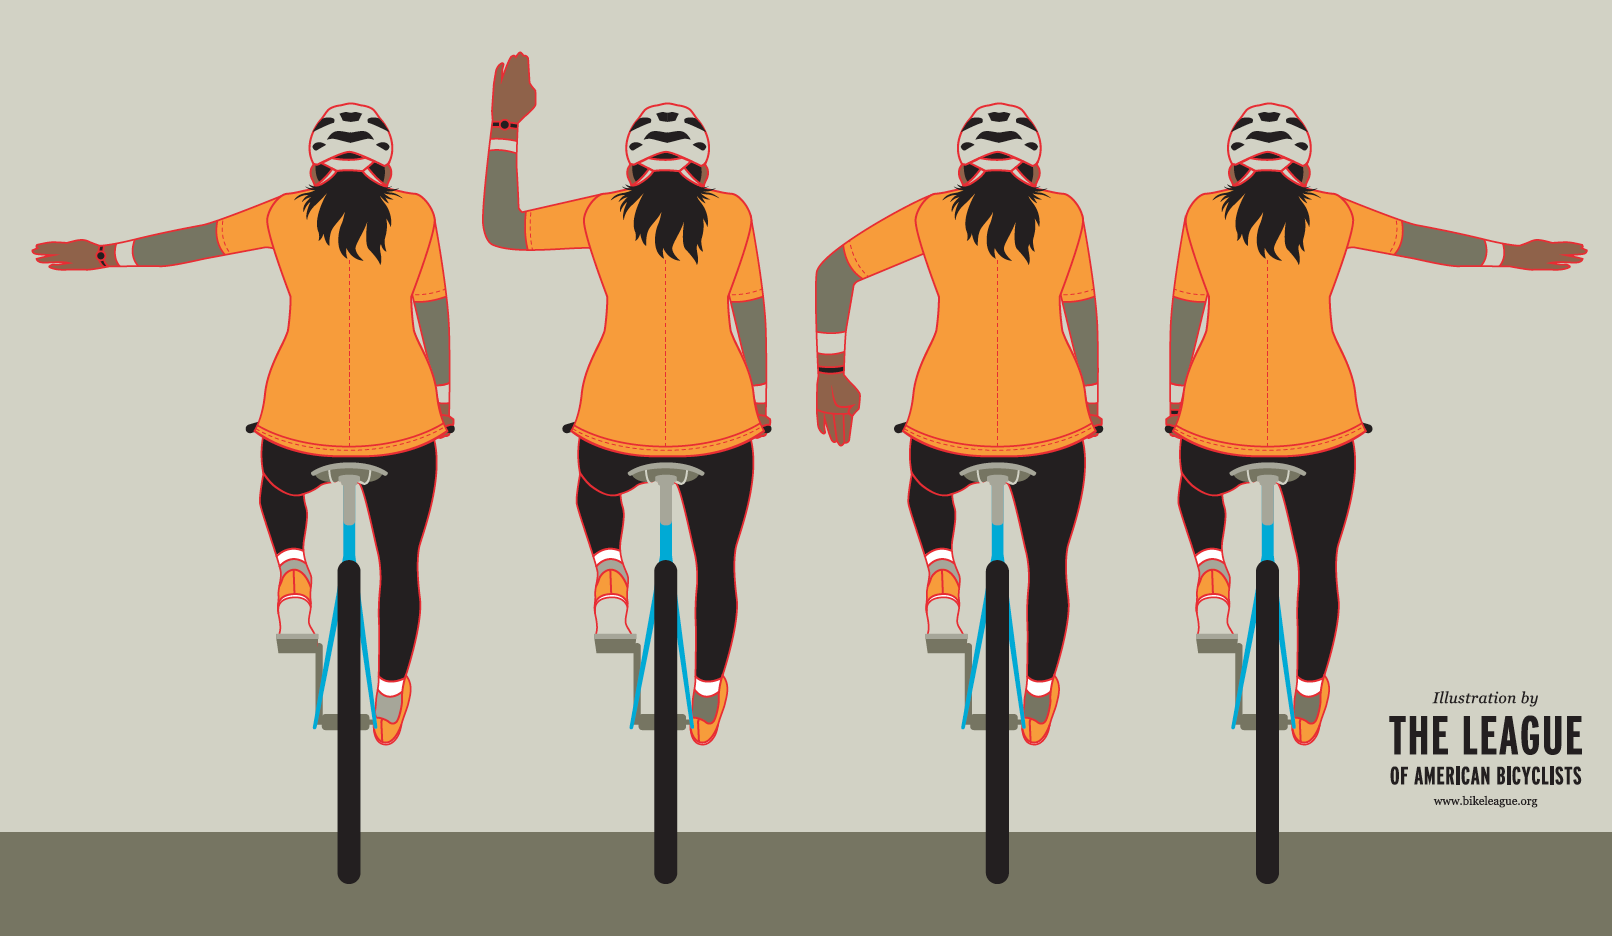
  • Left Turn: Fully extend your left arm out to the side.
  • Right Turn: Fully extend your right arm out to the side or bend your left arm up at a right angle with your hand flat. Both are legal signals, and depend on your level of comfort with which arm you use.
  • Slowing or Stopping: Extend your left arm at a right angle with your hand open and pointing down towards the ground.

Scanning

Scanning is the act of looking over your shoulder, and is a key part of riding anywhere. It helps communicate your intentions to others and also shows you what is happening behind or around you.

Pro Tip: It may be difficult to scan and maintain a straight line while riding. Start by practicing scanning on a stationary bike to see your range of motion. You may want to purchase a mirror to help if you have limited range. Once you start practicing on a moving bike, if you have trouble maintaining a straight line you may want to try removing your hand (from the direction you are scanning) from the handlebars and place it on your lower back. This helps prevent your body from fully turning and pulling the handlebars. And make sure to keep peddling while scanning!

Scanning should be used in conjunction with signaling — you should scan before any turn and before making any signal.


This blog post is sponsored in part by a generous grant from the Governor’s Office of Highway Safety.
Driving Safely around People Biking

Savannah’s level topography, dense urban form, and warm weather make it a great place to get around by bike. However, Savannah also has a high rate of traffic crashes involving people on bikes.

Tips for Safe Driving Near Bicyclists

React to bicyclists as you would any other vehicle. You wouldn’t drive inches next to another car, so why would you drive so close to a person on a bike?

Don’t park in bike lanes or blocking access to multiuse paths. It may just be “for a minute”, but that minute could be the difference in someone biking safely to their destination and being put in unnecessary conflict with another driver.

If there is oncoming traffic, slow down and wait to pass until traffic clears.

  • Check for bicyclists in your blind spots
  • When driving a larger vehicle, allow extra room for mirrors, extended wheel wells, trailers, etc.
  • Large profile vehicles can create a windblast, which can knock a bicyclist off the road
  • Return to your lane when the bicyclist is in your rearview mirror
  • Do not attempt to “squeeze by”

Do not past a bicyclist before a red light or stop sign, hill, or immediately before you make a right turn.

Give at least 3 feet of space! According to the updated 3 ft to pass law, updated July 2021:

  • A driver passing a person on a bike should change lanes if road and traffic conditions allow
    • Includes allowance to pass on a double yellow when conditions are safe to do so
    • No passing into blind turns, blind hills, or oncoming traffic
  • When it is not safe to change lanes, a driver is required to slow down to 25 mph or 10 mph below the posted speed limit, whichever is greater, to execute a safe pass within the lane and shared space
  • Violations of the law carry a maximum fine of $250 as a misdemeanor offense
  • Under Georgia law, a video recording of an act is valid as a witness for enforcement of violations

Don’t drive distracted or under the influence. Again, it’s the law!

Consider driving conditions. Whether it’s raining or sunny, there’s something happening that can influence your driving. Make sure to slow down or give yourself extra room if you need it, and consider pulling over rather than powering through if conditions are dangerous.

Avoid illegal courtesies, like encouraging someone to ride through a stop sign in front of you. They may be able to see further down the street than you, or may take more time to get rolling, which can cause everyone to get frustrated.

Know where kids are biking. Children may not know the rules of the road so slow down and pay extra attention when driving in areas where children can be expected.

Interested in learning more about being a Bicycle and Pedestrian Friendly Driver? Sign up for an upcoming class or view our webinar here!


This blog post is produced thanks to support from the Governor’s Office of Highway Safety.

What to do if you’re in a crash

If you have the misfortune of being involved in a crash, it can be overwhelming and you may not know what to do. When your blood is pumping, your mind is racing, and you may be injured, the last thing you want to do is have to Google what to do. Below are our steps for the best actions to take after a collision.

Before we start, we always recommend carrying your cell phone, ID, a listed emergency contact, and something to write with/on in case your phone is broken. A bracelet like a RoadID can provide your information, emergency contacts and allergy information if needed.

  1. Do not immediately move – you may be more injured than you think. 
  2. Dial 911. Request the police and an ambulance to your location. 
  3. Leave your bike in the same state it was after the crash. Take pictures of the scene, including your bike, any damage to yourself, damage to the motor vehicle, and license plate number.
  4. Obtain the contact information of any witnesses.
  5. Always wait for the police to arrive and file an official report.
  6. Get the business card of the officer. Write your report number on the card in addition to getting a copy.
  7. Immediately seek medical attention. When in doubt, go to the ER! 
  8. Never negotiate with the driver of the vehicle at the scene of the crash, regardless of who may be at fault. Get the driver’s name and their insurance and contact information, along with the names and contacts of any passengers. You may discover additional injuries or destruction to property after the crash.
  9. Make no statement to insurance until you talk to a lawyer. 

Involved in a crash or want to report a close call? Submit your report on our website.

Data collected from the Close Call form can help us and agency partners assess potential conflict points and the frequency of near misses (or unreported crashes) involving bicyclists, pedestrians and motor vehicle drivers. Bicycle and pedestrian related crashes are under reported and this offers another way to address persistent issues. 

If you have encountered a dangerous road hazard call 311 or visit our Report Hazards and Issues page. In an emergency, please call 911.


Riding bikes comes with risks — like all vehicles. If you have been in a crash involving a bicycle and aren’t sure where to begin, contact the Law Offices of Joseph J. Steffen, Jr. for a free consultation.

Joseph J. Steffen Jr is an avid cyclist who specializes in local bicycle law, and serves on the board of Bike Walk Savannah. His focus and passion is for safe cycling for you and your family here in the Southeast, knowing the challenges of working with police officers on their reports, and picking an unbiased jury panel at trial that will understand a cyclists right to SHARE THE ROAD.

Visit joesteffen.com/bicycle-law for more information.


This blog post is produced thanks to support from the Governor’s Office of Highway Safety.
Making your trip with Chatham Area Transit!

Combining your biking or walking trip with public transit can help make your trip more successful. Chatham Area Transit offers a lot of options to extend your trip and help you go the distance.

All of CAT’s fixed-route buses are equipped with bike racks so you can take your bike with you at no extra cost. No special passes or training are required, and each rack can hold up to two conventional bicycles so they are available on a first-come, first-serve basis.

Learn more about using the bike rack on the front of CAT buses by visiting their website.

Want to plan your route, but you’re not sure where your closest stop is located — or where the route goes? Check out the CAT Tracker to view stops near you and see up to the minute information on when the next bus is going to arrive.

Extend your route downtown — for free! Thanks to a partnership with the City of Savannah, CAT operates a free downtown transit system spanning land and water.

While biking downtown might be easy, it’s a little difficult to get across the Savannah River! The Savannah Belles Ferry system provides free passage across the River between the riverwalk and Hutchinson Island from 7 a.m. to 10 p.m. seven days a week, and bikes are allowed.


As always, make sure to follow our biking and walking tips to make your trip as safe as possible! Visit our Resources page for more information.


This blog post is produced thanks to support from the Governor’s Office of Highway Safety.